Clear paper jams
Paper jams can occur either inside the printer or in the document feeder.
CAUTION: To prevent possible damage to the printhead, clear paper jams as soon as possible.
ENWW
Clear paper jams 115
To clear a paper jam
CAUTION: Avoid pulling jammed paper from the front of the printer. Instead follow the steps below
to clear the jam. Pulling out jammed paper from the front of the printer might cause the paper to tear
and leave torn pieces inside the printer; this could result in more jams later.
1.
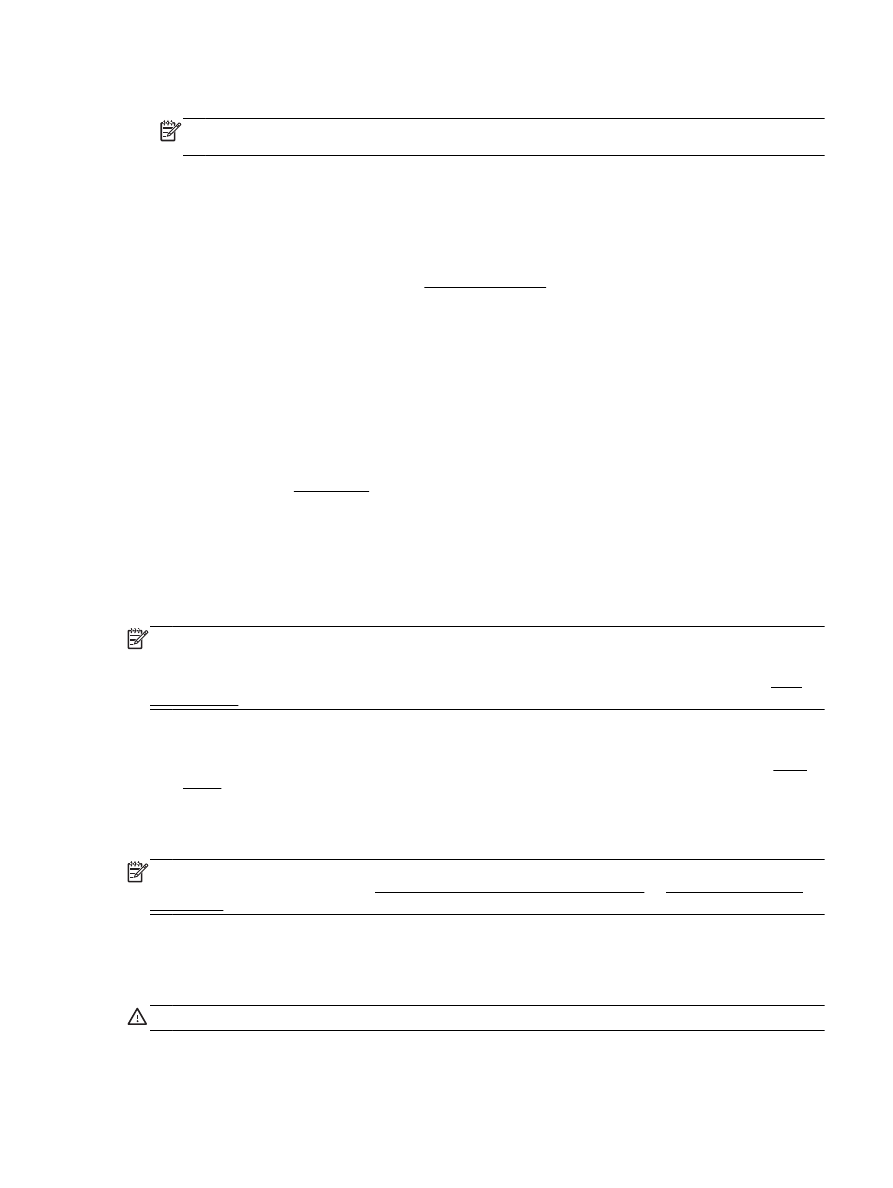
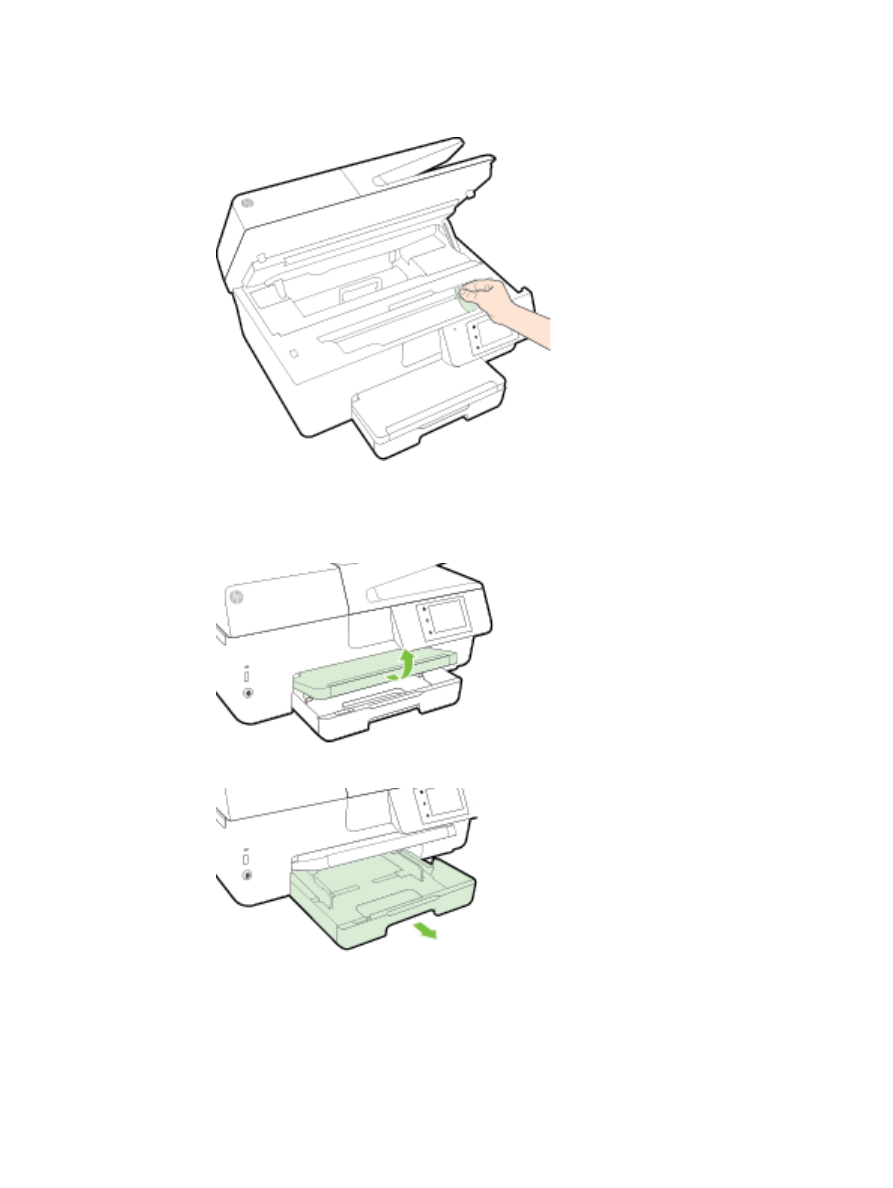
Open the ink cartridge access door.
2.
Check the paper path inside the printer.
a.
Lift the handle of the paper path cover and remove the cover.
116 Chapter 10 Solve a problem
ENWW
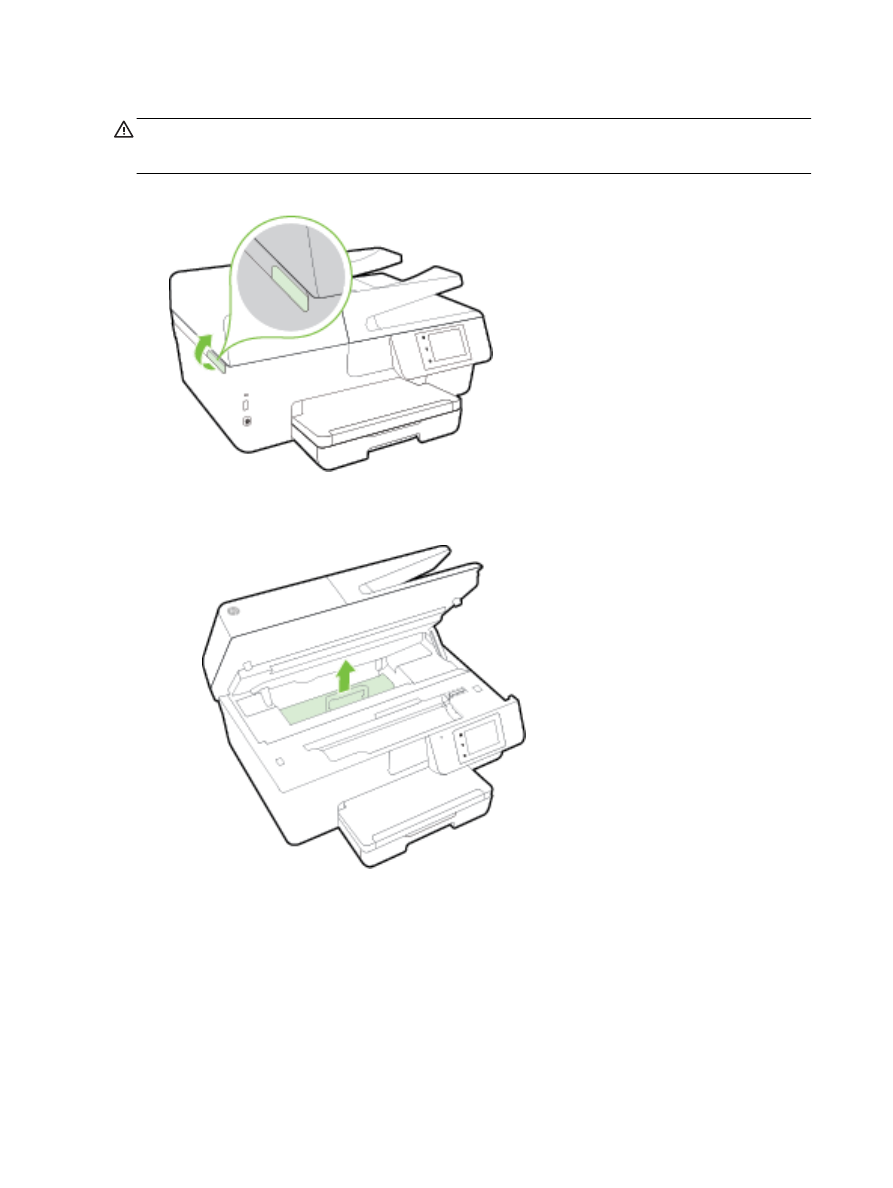
b.
Locate any jammed paper inside the printer, grasp it with both hands and pull it towards
you.
CAUTION: If the paper tears when you are removing it from the rollers, check the rollers
and wheels for torn pieces of paper that might be remaining inside the printer.
If you do not remove all the pieces of paper from the printer, more paper jams are likely to
occur.
c.
Reinsert the paper path cover until it snaps into place.
3.
If the problem is not resolved, check the print carriage area inside the printer.
CAUTION: During the process, avoid touching the cable attached to the print carriage.
ENWW
Clear paper jams 117
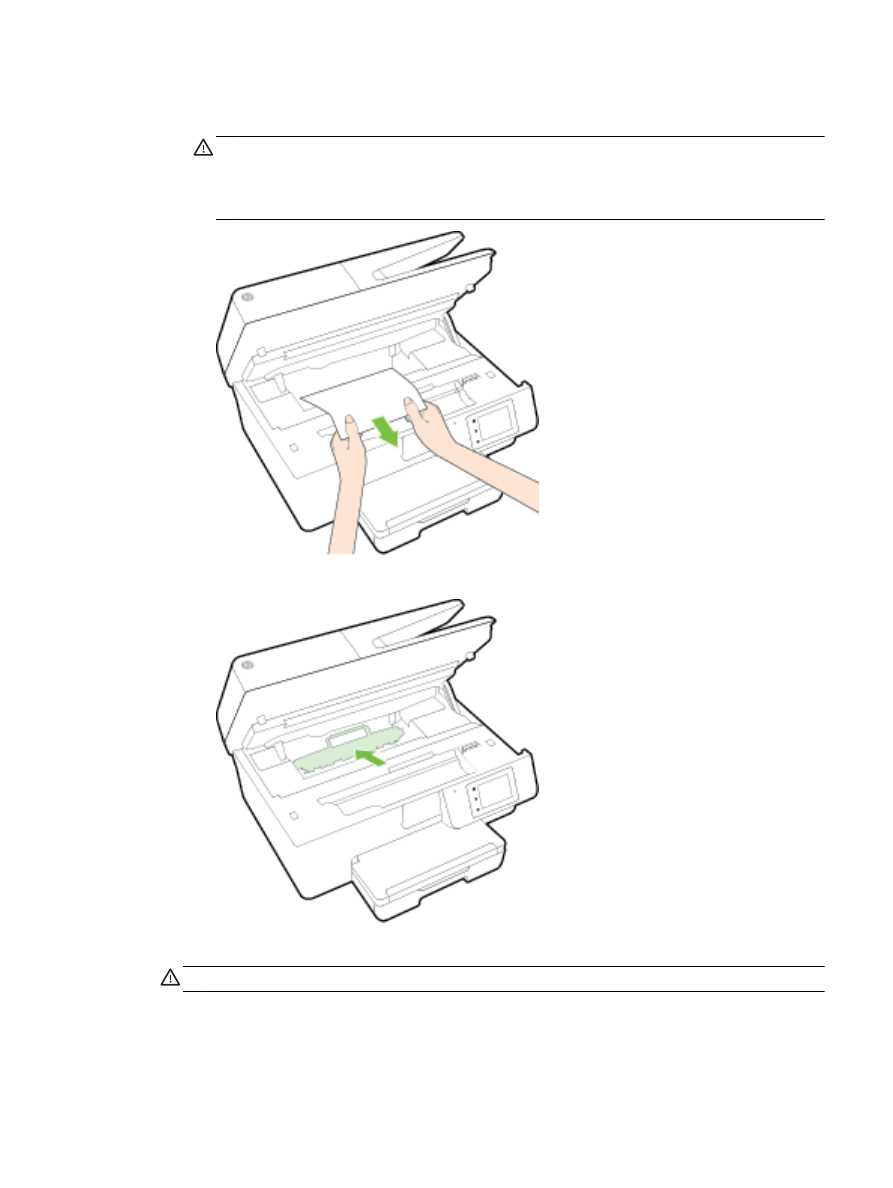
a.
If there is any jammed paper, move the print carriage to the far right of the printer, grasp the
jammed paper with both hands, and then pull it towards you.
CAUTION: If the paper tears when you are removing it from the rollers, check the rollers
and wheels for torn pieces of paper that might be remaining inside the printer.
If you do not remove all the pieces of paper from the printer, more paper jams are likely to
occur.
118 Chapter 10 Solve a problem
ENWW
b.
Move the carriage to the far left of the printer, and do the same as in the previous step to
remove any torn pieces of paper.
4.
Close the ink cartridge access door.
5.
If the problem is still not resolved, check the tray area.
a.
Lift the output tray.
b.
Pull out the input tray to extend it.
ENWW
Clear paper jams 119
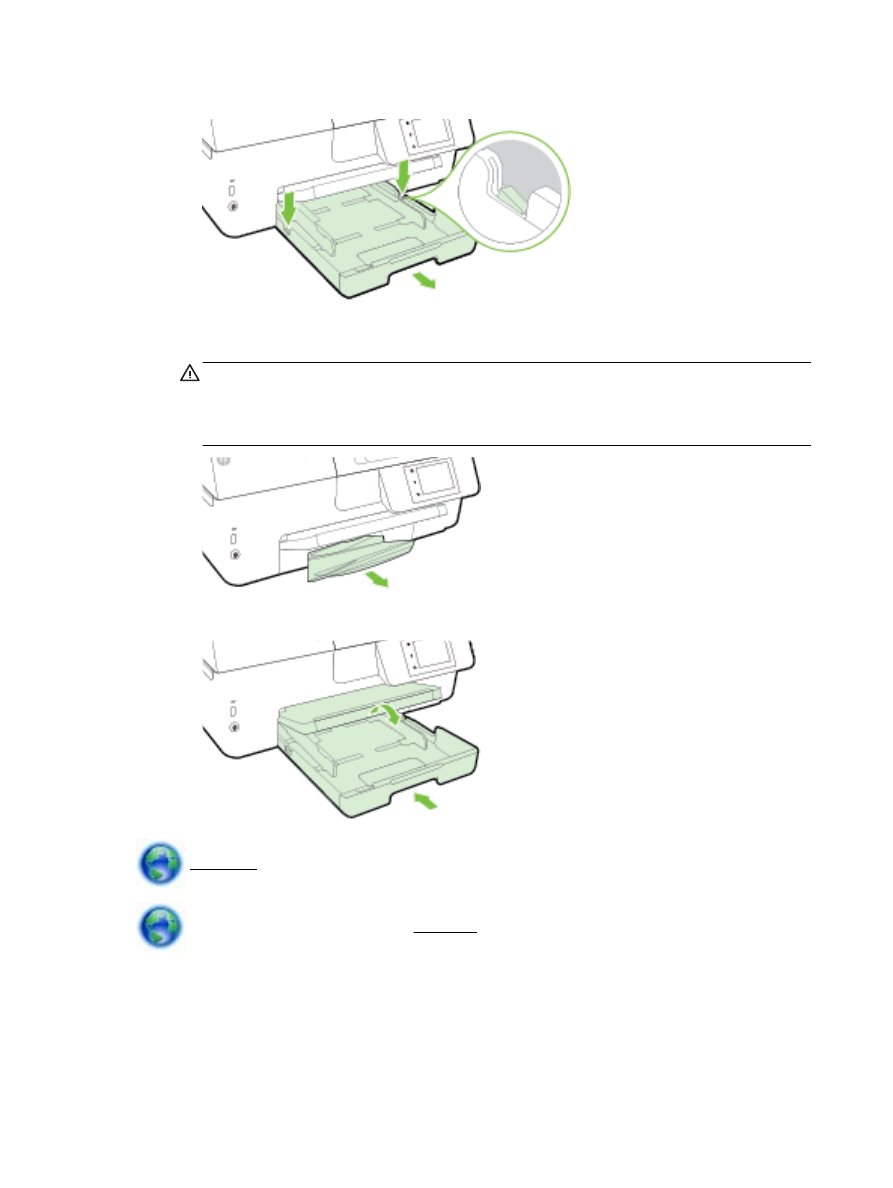
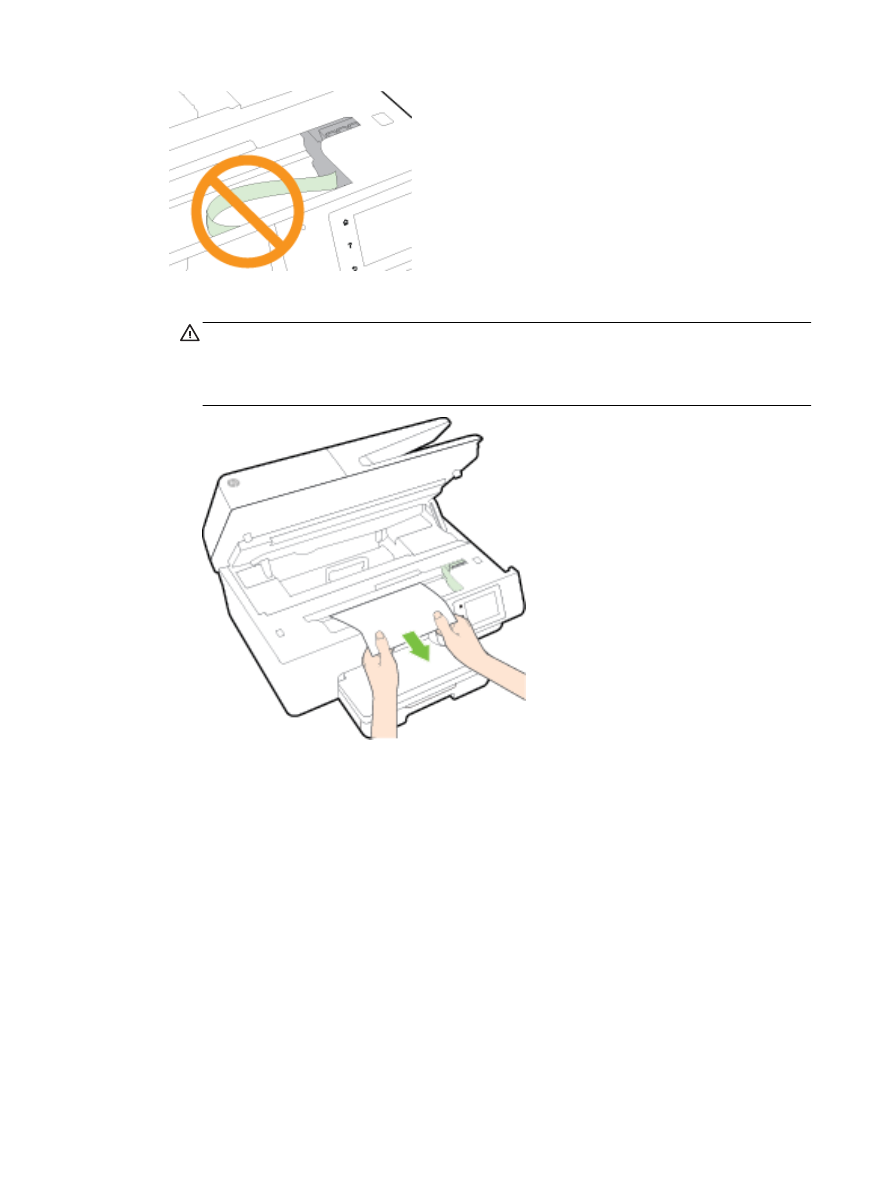
c.
Press down the buttons on both sides of the input tray, and pull to remove the input tray.
d.
Check the gap in the printer where the input tray was. If there is any jammed paper, reach
into the gap, grasp the paper with both hands and pull it towards you.
CAUTION: If the paper tears when you are removing it from the rollers, check the rollers
and wheels for torn pieces of paper that might be remaining inside the printer.
If you do not remove all of the pieces of paper from the printer, more paper jams are likely
to occur.
e.
Insert the input tray, load paper, and lower the output tray.
Click here to use the HP online troubleshooter to resolve a paper jam.
If the print carriage cannot move, click here to use the HP online troubleshooter to resolve a
print carriage jam. At this time, this website might not be available in all languages.
To clear a paper jam in the document feeder
1.
Lift the cover of the document feeder.
120 Chapter 10 Solve a problem
ENWW
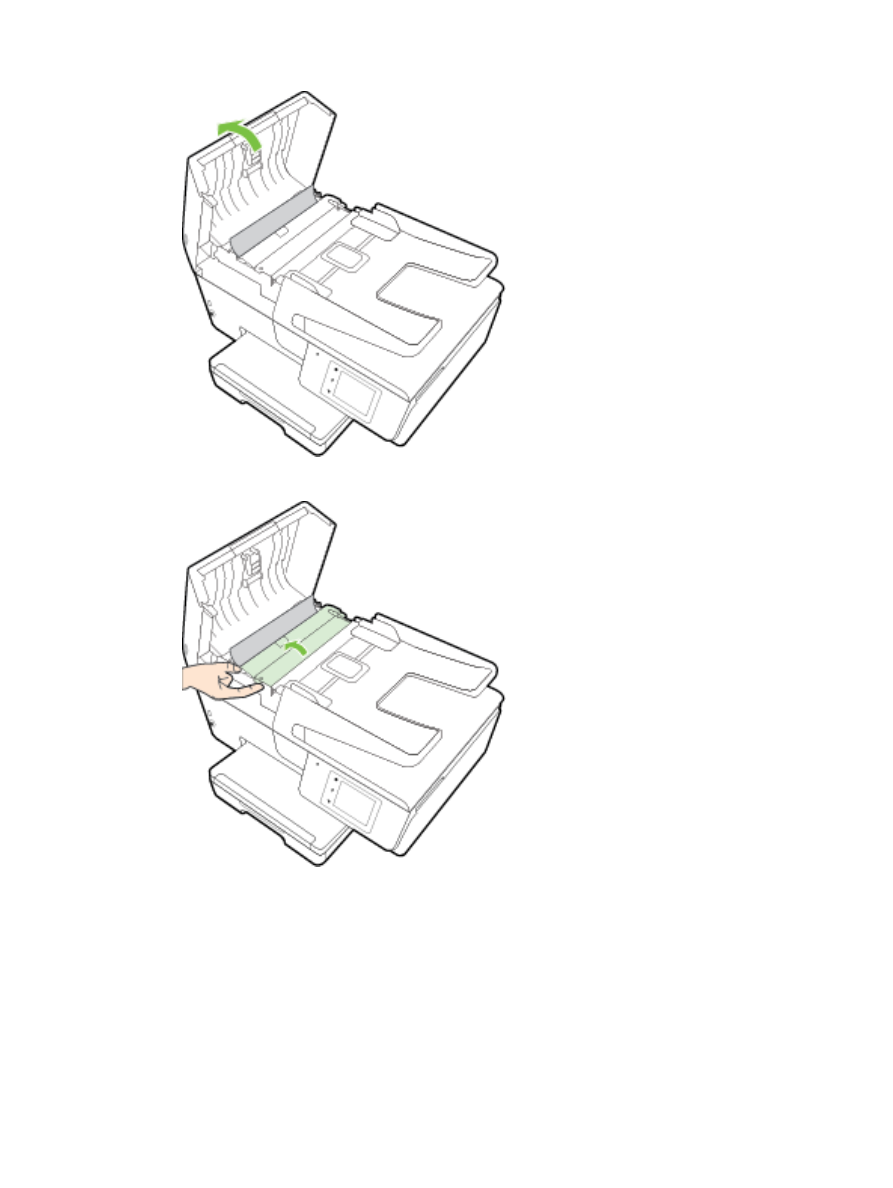
2.
Lift the green tab located on the front edge of the document feeder.
ENWW
Clear paper jams 121
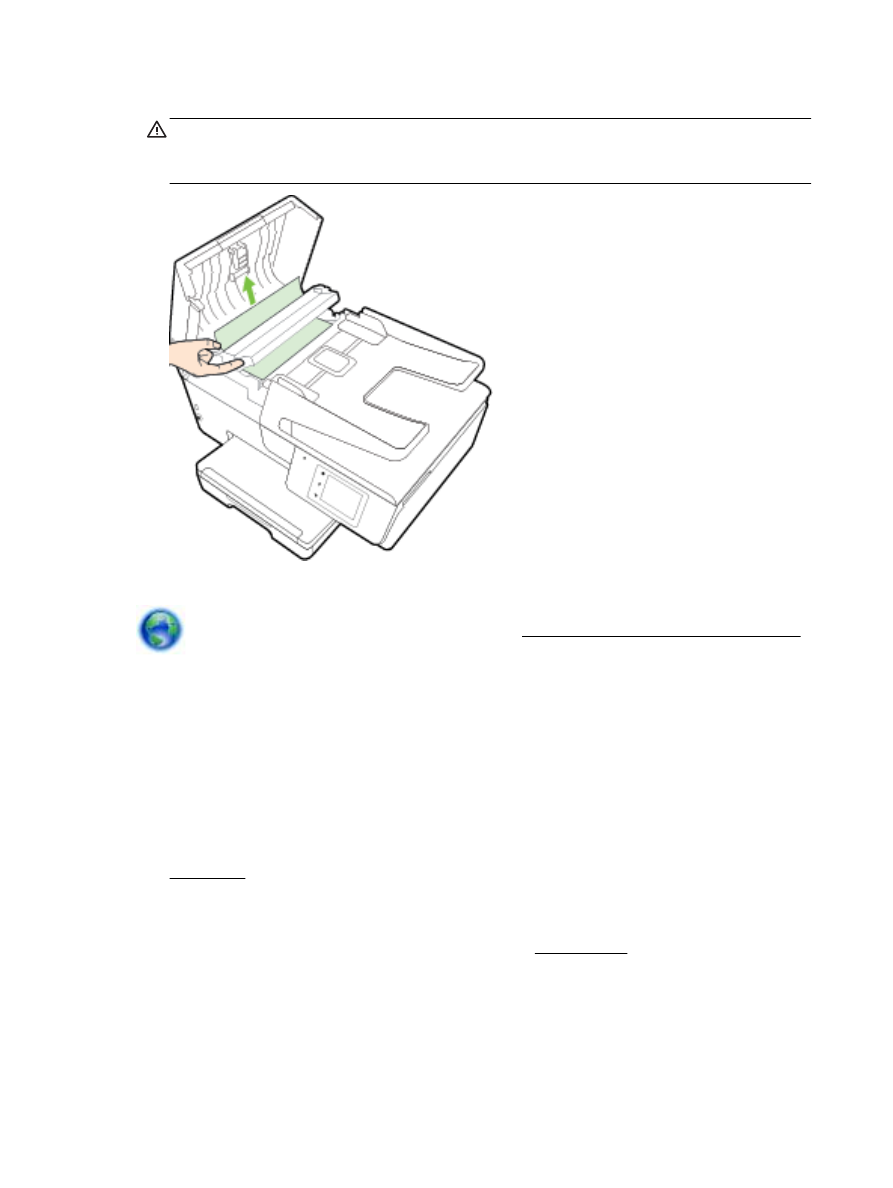
3.
Gently pull the jammed paper out of the rollers.
CAUTION: If the paper tears when you are removing it from the rollers, check the rollers and
wheels for torn pieces of paper that might remain inside the printer.
If you do not remove all the pieces of paper from the printer, more paper jams are likely to occur.
4.
Close the document feeder cover, pressing down firmly until it snaps into place.
If the above solutions do not resolve the problem, click here for more online troubleshooting.
To avoid paper jams
To help avoid paper jams, follow these guidelines.
●
Remove printed papers from the output tray frequently.
●
Make sure that you are printing with paper that is not wrinkled, folded, or damaged.
●
Prevent curled or wrinkled paper by storing all unused paper flat in a resealable bag.
●
Do not use paper that is too thick or too thin for the printer.
●
Make sure that the trays are loaded correctly and are not too full. For more information, see
Load paper.
●
Ensure that paper loaded in the input tray lays flat and the edges are not bent or torn.
●
Do not place too much paper in the document feeder tray. For information on the maximum
number of sheets allowed in the document feeder, see Specifications.
●
Do not combine different paper types and paper sizes in the input tray; the entire stack of paper
in the input tray must be the same size and type.
●
Adjust the paper-width guides in the input tray to fit snugly against all paper. Make sure the
paper-width guides do not bend the paper in the input tray.
●
Do not force paper too far inside the input tray.
122 Chapter 10 Solve a problem
ENWW
●
If you are printing on both sides of a page, do not print highly saturated images on light weight
paper.
●
Use paper types that are recommended for the printer. For more information, see
Recommended papers for printing.
●
If the printer is about to run out of paper, allow the printer to run out of paper first, and then add
paper. Do not load paper when the printer is printing.
●
Make sure that the printer is clean. For more information, see Maintain the printer.